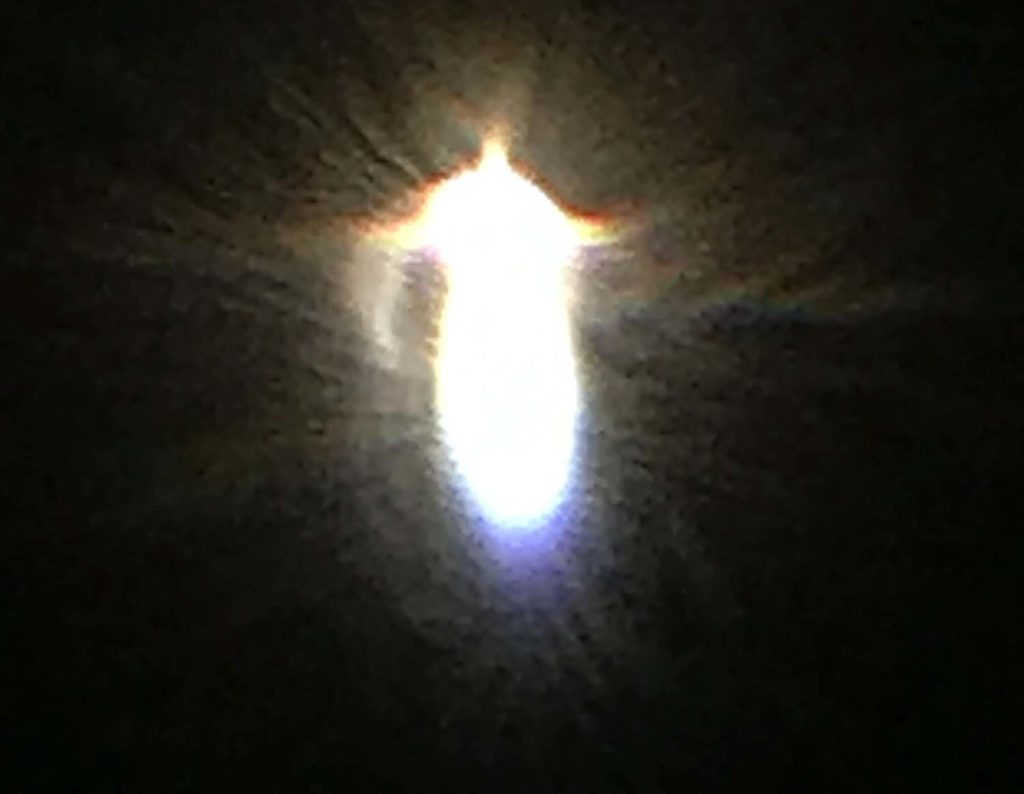
Big Picture Pinhole Mirror Solar Eclipse Viewing

Eclipse photography can call for specialized equipment, both for the hours of partial coverage before and after, and for the few short minutes of totality.  A Poor Man’s Pinhole Mirror can avoid some of those equipment issues, and allow for relatively safe viewing.  I do not know all the safe limits for Eclipse watching (except of course the use of ISO rated Eclipse Viewing Glasses) apart from my Darwinian sense which says “DO NOT LOOK AT VERY BRIGHT IMAGES”.  This skill has kept my eyeballs intact for 84 years, despite attending two other Solar Eclipses, plus searching marine sunset horizons many, many times (with only one success – I had to sail to mid-Atlantic for that) seeking the ever-elusive Green Flash.  An interesting side note on Eyeballs: As I aged I began to need reading glasses, and distance glasses for driving.  Then, when having further aged I started taking recommended “areds2 PreserVision®” vitamin E pills nearly a year ago. My distance vision has now improved to where my new driver’s license tested me last week as OK for no glasses: “Unrestricted”.  Don’t know if it’s the years or the pills but I’m happy to play tennis again without glasses.

Back on May 10th, 1994, an annular solar eclipse was visible in Toledo, OH.  Using a pinhole in a card only makes a small image when held by hand.  With the sun overhead covering about a 0.5 degree angle you get an image about half an inch in diameter on a white paper screen on the ground when you hold a pinhole card overhead.  Even using a small telescope or half of a pair of binoculars you still have to align them with the direction of the sun and only get a somewhat larger image.

I had the idea then, which must surely have been thought of many times before, to get more distance from pinhole to screen by putting my pinhole on a front surface mirror and tilting it to project the image deep into a darkened room.  This easily made set-up allows everyone to watch a larger, and fainter, image of the full process in relative safety.

On that day in 1994 I shone a reflected beam from a half inch dia. pinhole through an open door, deep (nearly 150 ft.) into a darkened warehouse and obtained a large image, about 15 inch dia., on a white paper flip-chart, of the partially eclipsed sun.  I tried to trace the outline of the sun and the moon on the flip-chart but by the time my pencil got around and back to the starting point the image was moved by the Earth’s rotation and the line failed to join up.  Somewhere the paper exists from that Eureka moment, but its exact location escapes me right now.

Some call the Pinhole Mirror a “Pinhead Mirror” but I feel the ‘head’ in that name implies the slightly domed or convex shiny top of a typical head of a pin and that would not create a focused image.  So for now I’ll refer to the apparatus as “Pinhole Mirror”.

The key to successful Pinhole Mirror usage is to have a “Front Surface Mirror” on a ‘flat’ piece of glass.  The flattest glass readily available is ordinary 6 mm (1/4”) thick.  6 mm float glass. It is so extraordinarily flat it can even give unwanted optical interference patterns if not properly used.  Float glass is made by pouring molten glass onto hot, liquid tin.  Under gravity the less dense glass spreads out, while the attractive force of surface tension tries to retain it as a large drop.  On planet Earth the two forces come to equilibrium at a glass thickness of 6 mm. Passing down to a cooler section of the float bath the glass solidifies and the stiff and strong material can be lifted off the still molten tin. Strictly speaking the glass is not mathematically ‘flat’ but theoretically is a constant thickness hollow spherical section corresponding to the curvature of the Earth’s surface!

The use of a ‘front surface’ reflective coating avoids the multiple faint, out of register, images which would occur with a regular domestic mirror when the glass/air interface (at the opposite side to the silvered surface) also gives its 4% reflection.

Pilkington/NSG Mirropane® has a hard metallic reflective coating of nearly 70% and is an excellent material for Pinhole Mirrors.  A small sample is all you need, provided you know someone in the glass business!  A higher reflection of around 90% can be had by simply dissolving the protective paint and copper backing off a regular silvered commercial mirror: apply a pad soaked in Acetone for a few tens of minutes.  The exposed silver is delicate and will eventually oxidize but it will be good for many days  observation during an eclipse event.

After the 1994 Annular Eclipse I used a Pinhole Mirror to track the Transit of Venus on June 18, 2012.  The same principles applied but I did not have access to a darkened room so the image below is only barely shows the silhouette of the Venus, between streaks of thin cloud. (see the small dark spot in the top right quadrant)\

The total Solar Eclipse of 21 August, 2017 was viewed from a public park in Bowling Green, KY.

The pinholes in my straw hat created many tiny images:

A handheld front surface Pinhole Mirror gave this small image of the progressing eclipse onto a white card, from a few feet away, in daylight. (No darkened room was available for better projection)

Meanwhile in Brooklyn NY, John Muggenborg, NYT Architecture Photographer, watched a partial solar coverage on the same day.  He came up with the idea of leaving his pinhole mirror fixed in modelling clay over 100 ft away while he moved his screen, at the bottom of a dark shading box, to follow the slow moving image to the great delight of many:

Meanwhile Keith and Aya, in Vancouver, BC, used a similar pinhole mirror beaming an image into a screen in their darkened apartment:

During totality in KY a quick shot with an unfiltered zoom lens on a digital camera dangerously just caught some of the solar corona as the full coverage ended:

Setting up for the coming April 8, 2024 event I have obtained an old scrapped movie camera tripod with pan and tilt screw adjustment.  The 2 inch square guide star mirror is on the right side of the pin hole mirror.  The pinhole size is adjustable by simply changing the circular disc mask size:


The adjustable tripod is very helpful as continuous fine tuning of the mirror aim is needed to counter the Earth’s rotation when projecting over a larger distance.  When the distance of mirror to screen is increased the image moves more rapidly, crossing my screen in just a few minutes when the mirror is 150 ft. away.  Ideally having someone to continually adjust the mirror angles gives more image observing and recording time. Projecting a long beam into a small window will need frequent resetting.  Adding a second 2” square mirror, slightly out of plane with the Pinhole Mirror, provides a bright, but fuzzy, guide-star image which can easily be seen in outdoor sunlight.  A target spot is chosen for this image corresponding to the aim of the much fainter, but sharper PH image in the dark room.

The optics of a fine beam over a long distance reveal other interesting phenomena:
First, the entry to the dark room cannot be through an old glass window. Even single thick, and reasonably flat 3 mm sheet glass readily shows many otherwise invisible distortions from miniscule thickness variations:

Smaller lights of slightly thinner 2 mm sheet glass gave other interestingly different patterns:

Even 6 mm laminated float glass will have a few slight distortions, plus it will incur the risk of multiple reflected images if the light shines through at an angle:

A portable slide viewing screen gives the best imaging when the reflected solar beam shines through and open window or door.

Another surprising effect is the visible extent of heat waves (shimmer?) when the light beam travels over a sunlight asphalt pavement.  Viewing the sun with a 19 mm (3/4”) dia. pinhole mirror at 150 ft. distance over grass still gives some shimmer on a cold, 38 F, windy day. That suggests the problem is the 30 F (17C) air temperature difference across the open door or window.

Reminds me of an engineering job I once applied for on the CFHT telescope on Mauna Kea where the engineer’s job was to keep the HVAC running to cool the instrument by day so there would be no temperature difference when the dome was opened at night.

Fine tuning my pinhole mirror apparatus will hopefully achieve a sharp enough image to allow sun spots to be observed.  I don’t expect it to resolve the solar corona during the eclipse but one can always hope?


Chris Barry
ChrisBarryG@Gmail.com
2024/04/05

Thoughts from Totality or Seeing the Only Star We Can Truly ‘See’

The Solar Eclipse of 21 August 2017

Starting at 5:00 a.m. we drove South: 415 miles in 8 hours. Two days before Google Maps had said it could have been done in 6 ½ hrs. (without the Eclipse traffic).  We used Google Maps to tell us how bad the traffic jams were, and Weather.gov to watch the developing Infra-Red and visible satellite view of the sky so we could attempt to avoid clouds at our destination.

– there was disturbed weather (colored areas on the map above) to the West of our path but we found a lovely little public park in Bowling Green KY, just 6 miles inside the totality path and just short of the Tennessee border (a white X marks the spot in the map above). They were having a very friendly eclipse party there and happily had room for us on the grass and under the trees.  That was fortunate because the highway police were making great efforts to prevent people from stopping on the hard shoulders of the interstates.

The eclipsing moon was just starting its path across the sun when we arrived under clear blue skies.  As during the annular eclipse I’d seen decades ago in Toledo, I once again felt slightly uneasy as an ever increasing greyness of the sunlight became more apparent.  It was like someone very slowly sliding a dimmer switch to our prime source of light (and life), but with a steadily increasing speed.  The change in light quality is very different from that in our daily sunsets.  The typical evening setting sun has a warmth to its reducing light.  During the eclipse there was a coldness to the illumination as it dimmed – I tried rubbing my eyes to fix it.

The easiest watching tool was my bird spotting scope on a tripod.  A science school teacher from Illinois took over focusing and tracking the moving image on a white screen, while I worked on mirrors and cameras:

My straw hat made more pinhole images on my collar and on the telescope screen when I looked down on it:

The ‘pinhole mirror’ was a 3 inch (75 mm) square sample of one quarter inch (6 mm) thick front surface mirror: 80% reflection Pilkington Mirropane™. It has incredible float glass optical flatness.  Taping over half the sample provided a bright reflection light to allow easy steering of the mirror, while the exposed 1/16 inch (1.5 mm) top left corner of the taped half, provided a ‘pinhole mirror’ image alongside – all it needed was a screen.

The smaller the pinhole – the sharper the image, but also the fainter.  The further back the mirror is from a white projection screen – the larger the image, but the harder it is to hold the mirror steady.
(Next time I should put the mirror on a pan/tilt head on a tripod, and incorporate an operating iris diaphragm, if I can find one).

Both images attracted lots of attention as the light inexorably dimmed.

Meanwhile John Muggenborg in Brooklyn (see Muggphoto on Instagram) had amazing results with his similar front surface mirror, just under one inch square.  He had the great idea of fixing the mirror 200 feet (50 meters) away and shifting his screen to track the moving image.  His screen was a beautifully effective open box, dark on 4 sides and white at the back:

Susan spotted Venus brightly shining even though the sun was only about 90% covered at the time (near the top right corner in the photo below):

And in the lobby of his Vancouver apartment, Keith projected an image from his small front surface mirror sample, with a hole in a piece of paper over it to reduce the aperture, onto a screen to delight the residents and guests.

Then with an alarming suddenness, and no sound from the sky (apart from people’s cries in the park), the sun went out!

The Corona was too dim to see through the very dark eclipse glasses, and yet it felt too bright to try my binoculars to search for corona details.  Rushing with camera and iPhone camera in manual overdrive to try to get an appropriate exposure at full 20 x zoom using new add-on lenses, while dripping sweat on the equipment, I did get the following with full zoom on a Canon G-10.

The corona was too bright to see details.  It looks much better in digitally enhanced images as in the APOD site: https://apod.nasa.gov/apod/ap170813.html

In the excitement I forgot to look through polaroid filters but doubt they would have shown anything.

One minute, 10 seconds later into the darkness, a diamond ring burst into view with a startling brilliance – it was the way kids might think that diamonds should appear if all the advertisements were true – the ‘stone’ in the ring was bright as an arc welders spot.  You could not look at it even if you tried.

My iPhone could only get:

I don’t seem to have burnt out any receptors in the iPhone but it must have been close!

Then 90 minutes of slow and steady return to the sky we once knew.


So we clearly saw that the overhead sun, and the moon, are truly circular and most probably spherical.  Our sun is the only star we can truly ‘see’, meaning whose shape we can ‘discern’ or ‘discriminate’.  All the other stars in the sky are so far away that their images, even through the best telescope, do not even cover ONE pixel in a camera.

The popular images of star fields seem to show big, medium and small size stars, but those images are ‘false news’.

The big, bright white circles are simply relatively close stars (more than 30,000,000,000,000 miles (5 light years) away).  The reason we see them ‘big’ in the camera is that their light is so incredibly bright that even though it is only shining on part of one pixel receptor, it reflects off it and overexposes many pixels around it.  (And, of course, the horizontal and vertical ‘spikes’ coming off the brighter stars are telescope reflections/refraction side effects and don’t really exist!)

So we cannot say for sure, from observation at least, that stars (other than our sun) are not square ﬦ , triangular Δ, or even star shaped   ҉ . . But now we have seen our overhead sun to be circular ⃝    and from some elementary astrophysics we can now safely assume that most stars really are spherical!


Spare a thought for the exoplanet hunters. They use this eclipsing method we just saw, along with others, to find planets around distant stars.  But the geometry never allows for ‘totality’ to be seen from distant earth, so those astronomers must work with only a very faint effect of partial eclipsing.

Perhaps my biggest surprise was that before the occulting moon had fully moved out of alignment with the sun, the very friendly eclipse watchers in the park packed up and drifted off – like leaving a great movie before the credits have even played.

We waited for the credits to roll, or the bloopers to play (none did), ate the strangest BLT ever for dinner and then joined the crowd for the drive home.

Well, if the traffic was heavy as people converged over 2 days on the 100 mile or so band of totality across the country, when the show was over, they ALL went home at once.  Google Maps traffic showed a wonderful screen of a network of red lines (choked roads) heading North and South away from the East-West path of totality.  Sadly we were too emotional to think of taking a screen-shot but Leslie and Glen, watching their syzgy just a little South of us in Tennessee did get one of the ‘eclipcalyptic’ traffic (Thank you):The drive home took 9 hours, but we’ve already started making plans to watch the next one!


Winter Holiday Puzzles

I.  The squirrels here love to eat the many fallen walnuts (as well as the roots of my freshly planted native plants!) even though the meat inside is protected by a very hard shell.

Squirrel_8392

But the squirrel has sharp teeth and manages, with great effort, to chew right through.

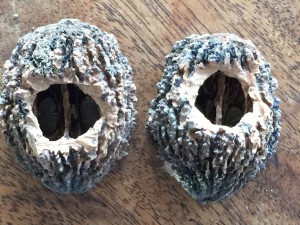
Gnawed Nuts_5064The puzzler is the many perfectly split walnuts which were lying on the ground near the end of April.  The inside meat has all been eaten without a trace of tooth marks on the shell:

Split Nut 5063I’d never noticed these hemispheres before.  The plane of the north-south split is fairly flat, smooth and almost polished.  How it happens I have no idea.  I took some whole walnuts, soaked them and froze them, and hit them with a hammer –  all to no avail, they refused to be smoothly split.  There is some secret cleaving process at work, and I’m certain the squirrels would love to take advantage of it if they could?
II.  The younger looking of a pair of bald eagles
2Eagles_8602has been putting sticks against this tree on Garden Island out back for a year now without getting one of them to stay in place.  This clip (click the white triangle in the middle of the picture below to play the video)

shows the bird hard at work, but at the very end the stick sadly drops to the ground once again, wasting all the effort.

It would be so beautiful to have an eagle’s aerie right here but the problem for now is how do I get the process to start?  It is not an easy tree for climbing!

III.  This winter’s weather has been so mild that my bees were actually gathering pollen on December 23, when the temperature was 50 F (10 C), who knows where this one found the bright yellow food packed onto her legs?
Pollen_8702I’ve found nothing in bloom anywhere nearby.  Ever tried following the “bee line” as they leave the hive on their way to their hidden food source?  I could not make it work.

It was so unseasonably warm that the Sandhill Cranes, who we haven’t seen for 10 years since Inez was last here from Spain, stopped by for the week of Xmas on their very late migration south.
Cranes 8746This photo was taken through a closed back window yet we could still here their unique chattering, clacking bills: sounded like humans squabbling about climate change.

IV.  Einstein very neatly showed that something with enough mass can visibly bend a ray of light. (Without any math, he simply stated that we could not tell the difference between the force of gravitational attraction and the force of accelerating a mass with inertia. So when a nearly horizontal beam of light from one wall to the other of your room seems to droop, it means either the room is accelerating upwards, or the room is being pulled down by a gravity field, which is also pulling the light beam down).

The sun at a distance of about 550 AU (Astronomical Units – 1 AU is the distance from earth to the sun) is massive enough to act as a “Solar Telescope” to form an image, of what might lie far, far behind it.   The enlarged image of a bright spot behind the sun becomes an arc or a circle.  A Black Hole would have a similar effect as the sun. (Radio waves are similarly bent.  A good receiver at the focus spot could listen to the radio programs from another galaxy, if any planets there happened to be broadcasting!)

APOD (Nasa’s Astronomy Picture of the Day) often shows images magnified by gravitational lenses.

Einstein Rings:  In the image below the gravity of a close luminous red galaxy (LRG) has gravitationally distorted, into a ring, the light from a much more distant blue galaxy which was directly behind the red one. http://apod.nasa.gov/apod/ap111221.html
Einstein RingsMy Puzzle is that I can’t understand how this works, in even the simplest terms:

An ordinary glass imaging lens (convex) works by bending light rays to come together to form a convergent image.
Convex LensMy problem with the gravitational lens is that the light rays are more deflected the closer they pass to the massive gravitational object.  This results in a fanning out or diverging series of light rays and not the convergence of the rays needed to make a visible image.  The rays shown below, from a star, apart from the red one which is swallowed by the BH, have an increasing bend or deflection the closer they pass to the BH.
Black Hole LensThus the massive object acts as a rather strange concave lens.  I know a regular concave lens looks like this:
Concave Lensbut its effect on a bundle of light rays should show a similar, non-imaging, divergence!

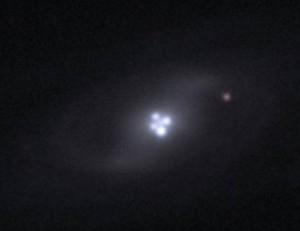
A simple point of light, in this case one quasar far beyond the focusing mass of a faint spiral galaxy, is often shown forming an “Einstein Cross” as 4 spots, rather than an arc or a circle.  http://apod.nasa.gov/apod/ap130102.html
Einstein CrossThat too I fail to understand!

Perhaps a clue lies in the gravitational images formed, not by a point mass, but by a cluster of galaxies:  http://apod.nasa.gov/apod/ap990104.html
Gallactic Cluster LensThe cluster CL2244-02 above is composed of many yellow galaxies and is lensing the image of a very distant blue-white background galaxy into a huge arc.
Here the rays of light from a bright spot far behind the cluster mass might come almost straight through the gravitational center of the cluster with little or no deflection.  The next adjacent rays would be somewhat deflected, and the next ones a little more so.   Thus the central area of the galaxy cluster could conceivably act as a converging lens, but further away from the center and outside the cluster, the rays will be deflected away from each other resulting in the concave lens effect sketched above.  So could there possibly be an imaging process, but only in the center of the cluster?


Any solutions to any of these puzzles will be gratefully acknowledged.


Happy Solstice, Winter Holiday, Xmas and New Year 2016 to all.